I'm going to go ahead and throw out an apology for the lack of posting. I'm on a critical care rotation and Jake is doing cardiology. They're both very demanding. I leave the house around 6:30am and I usually don't get home til about 10pm. Jake's schedule is very similar. There isn't much cooking going on these days. Look for a return to life at the end of this month when I get a break.

Wednesday, March 31, 2010

Braised Salmon w/ dill, broccoli, and a failed attempt at fried plantains [CL]


Salmon
Equal parts white wine and fresh squeezed orange juice. About a cup each. About a teaspoon of sugar. A few pinches of dill. Fresh would be great. Dried is what I have. A little salt and pepper. I had someone make me this recipe about six years ago and I tried doing it once myself about a year later from memory. That's all I remember there being in the recipe and it was really good. I think the braising technique has a lot to do with the flavor. That and the quality of OJ you use (fresh squeezed will be much better than from a container) and probably the wine you use, too. I use crappy wine, hence the addition of sugar. Otherwise it's a little bitter.
I add the wine to the pan (medium heat) first to cook of some of the alcohol. Then add the oj and sugar, s/p, dill. Add the salmon face down and turn the heat down a little, about med-low. Let the salmon cook for ~5-7 min, then flip and let go til done. Remove from the pan.
Make a smaller quantity of the sauce again to pour over the fish. It adds flavor without adding the fishy taste of your braising liquid.

I love fried plantains. They're extremely easy. Slice them up. Heat some butter in a pan and let them go til they get dark. Just make sure the plantains are ripe before you use them. Otherwise, you'll be posting pics on your blog with an empty space where the plantains were supposed to be.

Monday, March 29, 2010

Crispy Braised Chicken with fennel and olives [TK]


This is a late post from dinner I made this past Saturday. It's my first Thomas Keller recipe and my first time cooking with actual fresh fennel. I've been wanting to ever since I caught the 'fennel challenge' Iron Chef episode. Everything looked so good. And I do like using ground fennel. It was really good but, unfortunately, I only had 1 fennel...stalk? I'm not sure what you call them. I needed 3. I also used split chicken breasts cause that's what I had, as opposed to thighs.
You need:
Chicken thighs, skin on
2-3 fennel stalks/bulbs/whatever
~ 1 cup large green olives
8 sprigs of fresh thyme
3 strips of lemon zest
1 onion, chopped
1 cup chicken stock
garlic
1/4 cup white wine
bay leaf
red pepper flake
canola oil
parsley to garnish

You just use the fennel bulb for this recipe, so you can retain the core, stalks, and fronds for later use. To prepare, chop of the stalks and bottom of the bulb. Peel away the outer layers down to the core. Cut the outer layers into ~2X1 cm strips.
Heat the canola oil in an ovenproof pan large enough to fit the chicken in a single layer on the stove on medium-high heat. Add the chicken, skin side down, and brown for ~4 min. Turn and brown on the other side for ~1 min. And use tongs or something instead of grabbing it with your hand like I did cause it still kind of hurts 3 days later. Remove chicken and set aside.
Turn the heat down to med-low and add the onion. Fry til translucent, ~4 min. Add the garlic and cook for 1 minute. Add the fennel and increase heat to medium. Cook for about 10 minutes.
Add white wine and cook for 2 minutes to cook off the alcohol.
Add olives, red pepper flake, thyme, bay leaf, lemon zest, and chicken stock. Season with s/p and bring up to a simmer. Taste the stock and season as necessary.
Add the chicken, skin-side up, in a single layer and place pan in the oven at 375F. cook til chicken is done, ~20-30 min. Turn on broiler for a couple minutes to crisp the skin a little more. Remove pan from oven. Garnish w/ parsley. Let cool. Feast.

Sunday, March 28, 2010

Steak and sides [CL/JG]


History:
Joel suggested having a family dinner this weekend. We all said yes. Saturday I went to a local butcher near my parents, today everyone else went and got the rest.

Menu:
Sirloin Steaks
Rib-Eye Steaks
Grilled Vegetables with Melted Onions
Roasted Potatoes, Onions, and Green Peppers
Sauted Spinach with Shallots, golden raisins, and toasted pine nuts


Steaks:
Clark cooked perfectly. Salt, pepper, garlic. Rest at RT. Grill. Rest again. Savor.


Grilled Vegetables:
Large chop zuchinni, yellow squash, turnips, red pepper. Toss in oil, s/p. Grill. Chop into smaller pieces, fold in melted onions [see Southern Cooking]. Top with oregano and Herbs de Provence

Roasted Potatoes:
Chop 1 onion, 1 green pepper, bag of red potatoes. Oil in a pan with s/p, garlic, cumin, onion powder, white pepper, thyme, rosemary. Bake at 375 for about 45-60 minutes. Toss occasionally.

Spinach:
Saute 3 shallots and garlic. Wilt spinach, little white wine, lemon juice, pinch of sugar, golden raisins, and top with toasted pine nuts.
Enjoy a family meal.

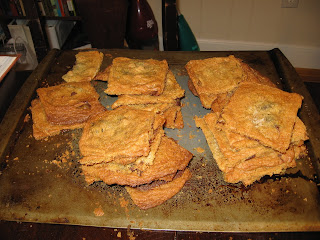
Ghirardelli Chocolate Chip Cookies [JG/TK/AB]


History:
Got the question right? Good, you get a cookie. So went the lecture I gave on diabetes. Here we have the recipe for the cookies.... and please use good chocolate. It makes all the difference in the world, especially for Chocolate Lava Cakes.....

This is one of those 'I read a few recipes and this is what I did' recipe.

Recipe:
344 grams AP
3/4 t baking soda
1 t salt
1.5 tsp vanilla
2 t cinnamon
280 grams chocolate chips
2 sticks butter chopped up
212 grams brown sugar
159 grams white sugar
2 large eggs

Cream sugars and butter. Add eggs and vanilla. Mix. Add dry and mix. Fold in chocolate chips. Bake at 350 for 12ish minutes. Enjoy.

Wednesday, March 24, 2010

Creme Puffs


History:
Like eclairs, only easier to make in bulk. I am teaching my first class tomorrow, and wanted to bring in treats.... yes I am bribing the students to like me. Everyone gets a creme puff at the beginning.

Recipe:
See Elcairs...

When pipping just make little circles.

Tuesday, March 23, 2010

Anita's Salmon again. And yes, I made more ice cream!


Anita's salmon recipe is just so damn good. And it's one of the easiest recipes ever. I finally got a pic of it for our original posting. You can check out the recipe on our earlier post "Lots of food". I made cucumber salad with it this time and actually never got around to posting the recipe for that when we originally made it near the start this blog. So here it is now!
Cucumber Salad:
You need:
cucumbers (~2 large ones)
3/4 cup rice vinegar
some sugar
some garlic
tbsp soy sauce
tbsp sesame oil
pepper
toasted sesame seeds

Thinly slice cucumbers and mix all ingredients except seeds in a bowl. Add cucumbers and toss to coat. Chill for ~ 1 hr. Toast the sesame seeds and add to mix. Serve.
I have also seen it with onions, chiles, and red pepper flake added. Do what you will.

And yes, I made more ice cream.

Seared Tuna with Quinoa and Asparagus [JG]


Jake made it. Pretty simple. Slather tuna with korean BBQ sauce. Sear on grill. Boil quinoa w/ a little honey, s/p. Asparagus in olive oil with garlic, s/p. Simple, quick, healthy, delicious.

Sunday, March 21, 2010

Egg Ramekin Crème Brûlée with Sugar Chip

History:
No history needed... I am so happy right now.

Recipe:
See Crème Brûlée below.
Cook time was 1 hr at 275. Water bath was hot tap water. Get to RT, then refrigerate.

Melted the sugar on parchment paper [don't let the kids do it], and broke into chips.

Crème Brûlée

History:
This might have been my first culinary conquest. I made it 2-3 times a week for one summer in maybe middle school? Now, I can't even eat it. I have lost some of my skill at making it.... but honesty, I just wanted a blow torch. And, boy, is it fun. What 14 year old boy does not want some sort of butane fueled fire? So here it is Crème Brûlée.

Recipe: [This is for a standard 5 ramekins...when I made it for the egg shells I halved the recipe]

1/2 vanilla bean or vanilla extract
2 cups heavy cream
4 egg yolks
salt
1/4 cup of sugar

Warm the cream with the vanilla extract until steam comes off and a light film is formed. Remove from heat and cool while you get the other part ready.

Whisk the egg yolks, sugar, and salt together until a think pale yellow that falls like ribbons from the whisk.

Combine via tempering the creme and egg mixture.

Return to heat. Heat the creme until thick and just shy of boiling [slightly bubbly].

Strain.

Divide in the ramekins. Add boiling water to the pan with the ramekins til halfway up the ramekins. Lightly cover with aluminum foil and gently put in the oven for 30 minutes.

Take out of water bath and cool to RT then refrigerate for at least 4 hours. Good for 3 days.

Sugar on top with torch. Or I have heard you can put under a broiler and get it. Just not as fun.

Egg Shell Ramekins

History:
I saw a recipe with White-Truffle Oil Infused Custards with Chive Chips in a TK book. Yes, I may do that one day, but I wanted to start by having creme brulee in little egg shells. It would go with with my little dessert spoons, and presentation would rock. The next post is going to be how to make creme brulee... I ruined it this first go around [first time cooking a custard in an egg shell... sorry. FYI TK was wrong] so I am doing it again later today. Plus I'll be making creme puffs for the class I'm teaching in the morning.


I cut out 6 eggs from a carton. Using a small spoon I starting tapping the top to crack it.. and slowly peel away some of the eggs. Then pour the first part....


Open the egg a bit more, enough for a spoon to fit. Pour out the yoke.


Wash out the eggs and leave inverted in the carton to drain. BAKE TIME WILL BE DIFFERENT from what you are use to. I'll let you know what I figure it out.

Thursday, March 18, 2010

Did somebody say MORE BBQ? Pulled Pork Sandwiches, no less.


Oh dear God, I've never been happier in my life. I was literally crying with happiness and hugging myself while eating today. I'm going to be fat by the time I get out of pharmacy school. One of the benefits of boxing (non-professionally) is that you can eat all day long. So you want to know what a 7.40 lb roasted pork butt looks like?

Bam! That's what it looks like. Beautiful. So I salted and peppered it and put it in the oven on 300F for about 5 1/2 hrs. Take it out and let it sit for at least an hour. Then shred that baby.

Then I slathered the remains in the BBQ sauce I made from the Professional Chef. I told you I made a ton of it. As a matter of fact, I've still got plenty left. Check out the recipe on our earlier post "Nothing Green Southern Cooking..."
And, of course, I had to make my own buns.

You can check out this recipe on another earlier post, "Burgers for my baby". This time I actually just used bread flour instead of adding some WW. These buns took the sandwich to a whole new level. The pork was done before the buns so I used one of my roommates store bought ones. Then I ate another sandwich with the fresh-baked bread. The difference was astounding. That's actually when I started crying and holding myself.
I also made the vinegar cole slaw again. Once again, check out the "Holy Lord Barbecue" post for recipe. I left out the corn this time.

Drink, Eat, Repeat

Gotta love community. I just found out that one of our IT wizards at the UGA College of Pharmacy also runs a food blog. I perused it between classes and I definitely like her style. Check it out at www.drinkeatrepeat.com. Go, Sarah!

Wednesday, March 17, 2010

Biscuit vs Biscuit!


History:
We still had some buttermilk. I decided to have a biscuit off with myself. The one to the left is the Southern JG/TK from Sunday Biscuits. It has a bit more color, honestly I have not tasted yet. I ran out of buttermilk so this is 1/2 buttermilk, 1/2 whole milk. The one on the right is the PC clark made see Southern Cooking, but I used buttermilk this time. Again I have not tasted. I'll update later with a taste comparison, someone was suppose to come over this morning for a run and then we could have had a tasting. But she didn't. Below is the recipe for the right biscuit, dropped down to 12 instead of the one clark did for 40.

Biscuit [12]
477 grams AP
33.9 grams sugar
25.5 grams baking powder [yes I thought this was excessive as well]
6.3 grams salt
9 tbsp butter [little over 1 stick]
1 egg
3/4 cup of buttermilk [plus a splash more.... called for 216 mL]

See previous methods... bake 425 for 15 minutes.

Enjoy.

Clark's note:
I don't think Jake is coming back to this post (he bought God of War III), but we both thought the Thomas Keller recipe was better. Everyone else at school liked the Professional Chef biscuits better. They were definitely sweeter since they have sugar in them. That was actually the very reason Jake and I liked the TK biscuits better. Both were absolutely delicious. We just liked the more savory ones better.

Tuesday, March 16, 2010

Egg Rolls [CL]


I gotta give props to my man Tommysan for this one. He was the kitchen manager at a bar/restaurant I used to work at. We made egg rolls for one of the daily specials and I had to get the recipe. They were so easy and so good. Who doesn't like egg rolls?
You need:
1/2 head of cabbage, thinly slice
a few carrots, shredded
green onions, chopped
mung bean sprouts, chopped
granulated garlic
white pepper
celery salt
onion powder
1 lb meat if using (beef or pork)
I also like to chop up a red chile or two but it's not necessary
Egg roll wraps. You might have to locate a specialy store for these. If you're in ATL you can get them at the Dekalb Farmers Market or probably several other places, especially up Buford Hwy.

I use enough vegetables to make a good even mix with the cabbage. 1/2 a head of cabbage will give you enough to make ~20 egg rolls. The good thing about them is you can freeze the excess after rolling them. To cook the frozen ones, just microwave for a couple minutes and then fry.

Chop up all your veggies and mix together in a large bowl. Brown your meat and drain. Return to the pan and add veggies. Stir fry with seasonings until cabbage is wilted. Remove from the pan and drain. This shouldn't take more than 10 minutes.
My wonderful sister told me how to place pics within my posts so hopefully I can show you how to roll them instead of describing it. It's pretty easy.

Lay your wrap in front of you in diamond formation. Wet your fingers with water and apply to the edge of the wrap from the top corner to about halfway along the edge. This is your glue to keep the roll rolled.
Place a couple of spoonfuls of filling on the wrap and roll from the bottom corner halfway up. Fold in the sides and continue rolling. Apply enough pressure to form a good seal with the top corner but don't rip the wrap. It tends to react badly while frying if oil can get inside the egg roll.
Once you've got em all wrapped up heat a pan with canola oil (or your frying oil of choice) at about medium heat. Medium has worked good in the past but my current oven needed it just a hair over medium. You might want to start off with just 1 or 2rolls to see how your temp is.
Once the oil is heated you can fry in batches at ~3 minutes a side (6 total) for the egg rolls. Drain on a paper towel and let cool before eating. They are freakin hot!
We ate ours with store bought sweet&sour sauce and hoisin sauce. You can also make a pretty good sauce with some vinegar, rice wine vinegar, soy sauce, brown sugar, ginger, green onions, and red pepper flake.

Monday, March 15, 2010

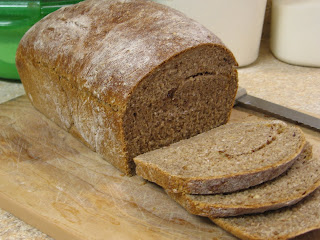
Multi-grain wheat bread loaf [JG/CL]


Made more bread today. This is my play on a Jake original. Pretty damn good bread recipe. We use lots of whole wheat flour and grains. For the grains I used pecans, walnuts, chia seeds, flax seed, milled flax seed, and sunflower seeds. I think that's it. If you want to add rolled oats or bran I would suggest soaking them overnight before adding them to your bread. I ground everything up in a food processor this time.
I always play around with times and amounts when baking (or making ice cream) so I'll just give you the basic recipe.
For the loaf you need:
360 g WW flour
1 packet of yeast (7g?)
1 tsp sugar
2 tbsp honey
2 cups liquid @ 105-115 degF (I use ~1/4-1/2 cup coffee. Jake likes to use tea.)

Mix all together and allow to sit, covered, for 30 minutes.
Add:
100 g WW flour
150 g all-purpose (AP) flour
7 g salt
Stir well to mix. Dough should form a ball and pull away from the sides of the bowl. Adjust flour/water as needed to get correct consistency. This is a much heavier, less sticky, more easily handled dough than the focaccia or ciabatta breads. You can allow this to proof for 30 minutes. I like to knead for just a few minutes and add some of my grains.
Lightly oil the bowl and return the dough to it. Cover with plastic wrap/damp towel and proof for at least 30 minutes.
Transfer the dough to a floured work area and knead for several minutes while adding grains to the dough. Form into a ball and return to bowl. Cover and allow to proof for 40 minutes.
Shape your dough into an even loaf that will fit all the way to the edges of your pan. Conversely, you can leave it in a ball and cook directly on a baking stone or pan. If doing so, the cook time/temp is different. You can also add some more grains in the shaping step. Lightly oil your pan and transfer the dough to it. Allow ~20 minutes for the dough to proof.
Heat oven to 350F and prepare a steam pan. Place the bread in the oven and pour a cup of hot water into the steam pan. Thirty seconds later spray the walls of the oven with water. Repeat in 30 sec. Cook for 45-50 minutes. Bread should sound hollow when thumped on the bottom. Allow to cool on a rack for 1 hr before slicing as bread will still cook after being removed from the oven.
I'll have to ask Jake what time/temp he cooks on when he doesn't use a loaf pan.

Jake's Note:
Cooking without the bread pan can be fun. This is actually how I started... making that rustic loaf for all to share at the table. When I do the 'rustic' loaf I prefer to have a crust. So crank up the oven to 450 and go for about 45 minutes. It is really hard to give a perfect time for bread... you will have to play a bit, but don't worry. It is worth it.

Sunday, March 14, 2010

Sunday Biscuits!


History:
My Northern mom used to make biscuits for us Saturday mornings with our cartoons. [Dear Rachael, I am trying to be correct in my grammar etc]. So I have always had a soft spot when you talk about a good biscuit with honey. I bough buttermilk when I was home to make biscuits for my mom to take to work [she took everything else], and so here are biscuits.

Recipe: [Inspiration came from TK, tried to be different from clark]
2 sticks butter
270 grams cake flour
270 grams ap flour
salt
tbs baking powder
tsp baking soda
1.5 cups buttermilk
1 egg

Preheat that oven to 425. Mix all the dry and the egg together. Chop up the butter [make it into little cubes]. Work butter into coarse crumbs with the dry goods. Add the buttermilk. Mix like 3 times [Seriously 3 times. Yes I am ocd, but it is important not to over work biscuits. Doing so makes them hard. Actually this comes from wanting chunks of butter in the dough. The chilled butter has a harder time melting in the oven so they add structure to the biscuit prior to melting. And yes some recipes will call for chilling the dough prior to baking to ensure this step has occurred.] Lie the dough out of a flat surface use a dough pin to spread out. Go until about 3/4" thick or so. Use a glass [I used a pint glass] to make the biscuits; quick downward motion with a slight twist. You should hear it fart or so. Keep going until you have the remains, refold together and do again. Bake. I think I made 12 biscuits with this. One to the left of the triangle on top you can see the left overs. Not quite as pretty. Bake for 15-18 minutes, I just put them in until I smelled them.

Enjoy.

Saturday, March 13, 2010

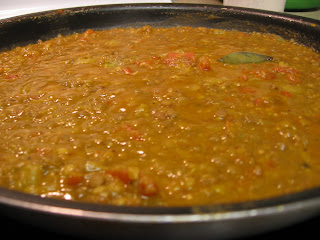
Daal, or dhal, or dal. And more ice cream. [CL]


I actually made some daal yesterday. Yeah, I'm a day late posting. And yes, it gets spelled several ways. THat's what happens when you take a word from a foreign alphabet and spell it in english. Dhal is a typical indian staple food. There are many different ways to prepare it, but it is basically a lentil-based dish with a lot of spices. It is also one of my favorites. I eat it over rice as a quick, simple dish that tastes great and is more filling. My recipe probably isn't the typical way of making it but it is actually my favorite of all the recipes I've tried. Unless we're talking someone's indian or pakistani mom. But I never can get them to give me a recipe so I had to make up my own. You could probably do it almost exactly like the chana masala recipe I got off of smittenkitchen.com but I'll give you my recipe.
And yes, I made more ice cream. Coffee this time. It hasn't frozen yet so we'll have to wait for a picture but I can already tell you it is delicious.
For the daal:
You can use just about any color lentil you like but I go with a cup or 2 of brown lentils.
Boil 'em in a pot of water with some salt. It will take about 20 minutes for them to get soft enough to mash. Keep adding water as they boil to keep plenty of fluid.
While they boil you can cook up the spice mixture.
You need:
1 onion, chopped
bay leaf
2 good pinches cumin seeds
1 good pinch mustard seeds
1 tbsp garam masala
a little less ground cumin
half as much ground turmeric and ground ginger
1 green chile, or red or habanero or jalapeno or ground red pepper or something with some heat
2-3 chopped tomatoes (or a can of diced)

Fry the onion in olive oil on medium heat til translucent. Add the bay leaf and seeds and fry for ~30 seconds.
Add the spices and chile and fry for ~30 seconds.
Add the tomatoes and fry for ~2 minutes.
You can also add a can of kidney beans with the tomatoes to make it a little hardier.
Hopefully, when you add the tomatoes the lentils are soft enough to mash. Mash while the tomatoes cook. You don't have to have all of them completely mashed but you do kind of want it to look like lentils in a gravy of lentils.
Transfer lentils with liquid to your pan of spice mixture and reduce heat.
Stir to mix. Season with s/p to taste. Add water if necessary to maintain consistency. You don't want it too thick.
I serve this over my basmati rice recipe. You can check this recipe out on an earlier post.


Coffee Ice Cream:
I used to have a pretty serious ice cream addiction. I broke it years ago by going cold turkey. I just never bought any and after a while, I never needed any. Now that I've decided to start making ice cream I fear I have reawakened my addiction. Anyhow, here's how I made it this time:
1 pint/473ml Heavy whipping cream
1 pint/473ml Whole milk
185g sugar
50g coarse ground coffee
7 egg yolks
damn, I just realized that I forgot the salt (a good pinch).
see original ice cream post for method

Thursday, March 11, 2010

I cooked as well.... [Cinnamon Raisin Bread]

History:
My mom loves cinnamon raisin bread, and clark and i have found the best recipe. So knowing I was coming home I had to make it for my mom. As a side note I have made dinner for my parents the last 3 nights. Sirloin over salad, lasagna, and marinated chicken. Nothing we haven't already talked about. Hence no recipes. My mom does not branch out that much. But, here is our cinnamon raisin bread.

Recipe: [PR]
This is a two day recipe. But well worth the extra time spent into it.

Soaker:
170 grams whole wheat
pinch of salt
170 grams milk [I like whole milk... only 3% fat so really, is that 1% going to really kill you?]
170 grams raisins.

Mix and over. Leave on the counter.

Biga: [All this talk of biga and sponge. They are just different ratios of flour:bread:yeast to autolyze or give an extra breakdown of the sugars prior to the main fermentation]
170 grams whole wheat
1/3 packet of yeast [save the rest]
85 grams milk
1/2 stick of butter, melted
1 egg

Mix well, cover, and refrigerate for at least 8 hours.

We tend to do this the night before, and then after school finish.

Final product:
Soaker
Biga
56.5 grams whole wheat [I always use more then this]
bigger or 2 pinchs of salt
rest of yeast
28.5 grams [1 oz] of honey (this makes a mess when you hand knead]
4 grams or as much as you want of cinnamon
85 grams toasted walnuts and/or pecans [I tend to have toasted walnuts and crushed pecans]
3:2 sugar: cinnamon for inside

Chop biga and sponge into pieces.
Mix everything except walnuts/pecans together. It should be a heavy dough, how does it feel? Should be tacky, but hold its own.
Fold in the walnuts by kneading.
Oil a bowl, spin the balled dough in, and proof for ~2 hours. Let it become 1.5 its size or a bit more.
Fold out into a flat piece. How wide? Wide enough to fit into your bread pan. How thick? 1/2 inch or so. Cover the surface with the sugar:cinnamon mixture. Be generous, and then fold up a la snake, pork etc.
Proof in the bread pan until flush with top or you don't want to wait.
Preheat over to 400
Put bread in turn down to 325
Go for 25 minutes. Rotate 180 degrees
Go for another 30 minutes or so.

Enjoy

Wednesday, March 10, 2010

Catch up day--Posting old recipes

It's ugly as hell out today, Eva is at school and Anita is asleep. So, as promised, here are a couple of recipes from earlier posts that I never got around to putting up. I love middle eastern food. Indian is my favorite, but just about anything from Morocco to India makes me very happy. I have a couple African/Middle East/Indian cookbooks I pull from. Here are a couple recipes straight out of one my sister gave me a few years back by Josephine Bacon and Jenni Fleetwood.

Chicken with Tomatoes and Honey
This recipe is not only really damn good, but it is also pretty simple and only takes ~1 hr total. You basically throw everything together in a pot and just let it go.
You need:
Sunflower oil (or just regular olive oil if you don't have any)
an equal amount of butter
chicken
1 onion, grated
garlic
ground cinnamon
ground ginger
~3 lbs of tomatoes, skinned, seeded, and chopped
2 tbsp honey
2 oz/ 1/3 cup blanched almonds
sesame seeds
s/p

Heat the oil and butter in a large pot. Add the chicken and cook over medium heat til browned, ~3-5 min. Add the onion, garlic, cinnamon, ginger, tomatoes, and seasoning. Heat gently til the tomatoes begin to bubble.
Lower the heat, cover, and simmer gently for ~1 hr, stirring occasionally til the chicken is cooked.
Transfer the chicken to a plate and increase the heat to reduce the sauce to a thick puree, stirring frequently. Stir in the honey and cook for about 1 minute.
Return the chicken to the pan and cook for another 2-3 minutes.
Dry-fry the almonds and sesame seeds in a pan and sprinkle over the chicken.

M'hanncha (or, 'The Snake')
If you've been reading the blog, you've seen me mention the snake. This is a moroccan dessert that is my new favorite. It can seem a little daunting since it requires filo pastry, but it is actual really easy to make. The danger with this one is that you might go into a sugar coma since there is a lot of sugar in it and it is really hard to stop eating it. I have several roommates and roommates' girlfriends who can attest to that.
You need:
115g/ 2/3 cup blanched almonds
115g/ 1/2 cup butter, softened plus a little more for cooking almonds
300g/ 2 2/3 cups ground almonds
50g/ 1/2 cup confectioners' sugar
115g/ 2/3 caster sugar (this is superfine sugar. I usually just use a 1/2 and 1/2 combo of table sugar and powdered sugar and, as stated, you could probably get by with reducing the amount of sugar just a little bit. If you're going by weight, it won't matter but if you're using volume measurements, the larger grains will give you less sugar in the end. Just don't blame us if you get diabetes.)
2+ tsp cinnamon
1 tbsp orange flower water (so many of these african/middle east recipes call for this stuff. I've never been able to find it. Just throw in a little water. I added a little orange zest to it once.)
Filo pastry and melted butter for brushing
1 egg yolk
powdered sugar and cinnamon for dusting

Fry blanched almonds in a little butter until golden brown and then pound them in a mortar and pestle til they resemble coarse bread crumbs. Place all the nuts in a bowl and add the sugars, softened butter, cinnamon, and orange flower water. Using your hands, form the mixture into a paste. Cover and chill for ~30 min.
Heat the oven to 350F. Grease a large baking pan.
Open out the sheets of filo pastry. Keep them in a pile so they do not dry out. Brush the top one with butter.
Take lumps of the almond paste and place them along the edge of the bottom of the filo sheet. Roll up the filo to a thumb's thickness. Squeeze the ends of the dough roll like an accordion to relax the dough before coiling it in the center of the pan. Continue brushing the sheets with butter, rolling the paste, and placing the rolls end to end to form a large, tight coil. You know, like a snake.
Mix the egg yolk with a little water and brush this over the pastry. This gives it a nice dark brown look once cooked. Purely aesthetic. Not necessary for flavor. Bake the pastry for 30-35 minutes until crips and lightly browned.
Dust the top with powdered sugar and lines of cinnamon.
Wait for it to cool. You WILL burn yourself. Enjoy.

Tuesday, March 9, 2010

Lots of food: Day 2 aka LASAGNA!


We're getting fat now. Everything we had today was absolutely magnificent. It really almost makes me cry with joy. I was really upset it was just the 3 of us and we didn't have more people to share this splendor with.
We had:
-Lasagna [CL]
-Focaccia Bread [PR]
-Chocolate and Vanilla Ice Cream [CL/PC]

Oh my god, lasagna is so good.
I always make my own sauce. I'm a purist. I can't help it. How I made it this time:
For the sauce:1 med-large onion
1 green bell pepper
1 red bell pepper
a couple of tomatoes (anytime I put canned tomatoes in something I also throw in some fresh ones, too)
a few fistfuls of ripped up spinach
~1 lb. ground beef
1 large can crushed tomatoes
1 regular (14 oz?) can of diced tomatoes
1 small can tomato paste
a lot of garlic
fresh basil, oregano, thyme
a little red wine and sugar is good too
s/p

Other things that go well in lasagna:
sweet italian sausage (I love doing this but the ball and chain won't let me)
zucchini (not only good but adds a little protein for those vegetarian-types)
mushrooms (I can't stand them but everyone else likes them)
roasted red peppers (I tried to do it this time but anita's weird oven burnt my pepper all to hell)

Brown your meat, drain and set aside. Chop up the onions and get them frying in way more olive oil than you would normally use. Yes, we like olive oil. Get those mono-unsaturateds, baby. Throw in the garlic after a few minutes.
Add chopped peppers and cook for a few more minutes.
Add chopped fresh tomatoes, if using, and let go for a couple more minutes.
Add the spinach and ground beef. Cook just til spinach starts to wilt and beef has reheated.
Add all your canned goods, herbs, s/p, and a shot of red wine and sugar if you've got it.
Bring the pot up to heat and then simmer on low as long as you like. Give it at least 15 minutes before tasting and adjusting.

Constructing the masterpiece:
People have their different methods. i don't think any one way is better as long as you've got all the ingredients. This is just how I do it.
Get the biggest damn baking dish you can find that will fit in your oven because, in my opinion, you can never make too much lasagna. Place a thin layer of the sauce on the bottome of the pan.
Layer noodles.
Layer riccota cheese. And please don't screw this up by getting low-fat. Eating a baking dish of cheese is still eating a baking dish of cheese. Don't fool yourself into thinking it's going to be healthy somehow.
Layer sauce.
Layer mozzarella/parmesan/provolone/asiago mix or individual cheese and don't be stingy.
Repeat until there's no room left. I can only ever make 3 layers. Some people make 7 layer lasagna. I don't know how you could do this unless it barely has anything but noodles in it. Or if you've got a really deep pan which I've been on the lookout for forever. Just make sure and top the lasagna with sauce and cheese. I also like to add fresh basil leaves to the middle layer. I can't get enough basil.
Cover with foil and bake at 375F for about 40 minutes. Take the foil off and bake for another 10-15 minutes. This gives the top a nice brown to it. Let it cool for a few minutes before tearing into it.

Focaccia Bread:
note: the bread pictured with the lasagna is not the focaccia bread. It is actually the last of the ciabatta bread. This is the focaccia bread.

Best focaccia bread ever. It takes 2 days to make. The first day is easy. You make a poolish (pre-ferment), leave it out for a few hours and then refrigerate. See the Ciabatta bread entry for poolish recipe.
The second day is the beast. It's not that it's difficult, it just takes a lot of time. Probably around 4-5 hrs til ready to eat but, my god, it is soo freakin good.
Like this:
Take the poolish out of the fridge an hour before ready to start to take of the chill. For the focaccia bread you will need:
12 oz/ 2& 2/3 cups bread flour
2 tsp salt (I go a little less on this)
6oz water, lukewarm
3 oz olive oil
the rest of the yeast packet, ~2 tsp/0.22 oz
1/4 - 1/2 cup of herb oil
note: the herb oil is the best flavoring agent to use. To make, simply warm (~100F) a cup of olive oil and add any fresh or dried herbs and other seasonings. Allow to the herbs to steep, infusing it with their flavor. Good things to use: basil, oregano, thyme, parsley, rosemary, sage, tarragon, herbs de provence, salt, pepper, garlic, or anything else you like.

Stir together flour, salt, and yeast. Add water, oil, and poolish. Stir to mix for about 5 minutes to work the gluten. The dough, much like the ciabatta bread, is VERY light and sticky. You also work it in a similar manner. The main difference is you let the focaccia bread ferment longer. The point is to allow the thin, light dough to fill with gas from fermenting and create large air pockets all throughout the finished bread. This is what the dough looks like:


Once your dough is mixed, generously flour your work area. You don't want the dough to stick to the counter as you want to work it as gently as possible.
Transfer the dough to the counter, dust liberally with flour, and pat into a rectangle. Wait 5 minutes for the dough to relax.
Coat your hands with flour and stretch the dough from each end to twice its size and fold it over on itself, letter style, back to a rectangle. Mist the top of the dough with spray oil, dust well with flour and cover loosely with plastic wrap.

Let the dough rest for 30 minutes. Repeat the stretch, fold, mist, cover routine. Wait 30 minutes and repeat once more. Now let the dough ferment for an hour.
Line a 17 by 12 inch sheet pan with parchment paper and drizzle ~1/4 cup of olive oil onto it. Yes, you will need a pan with a lip on it, otherwise you will get oil all over the place. Spread the oil over the paper with your hands so that the entire sheet is covered. As gently as possible, using your hands or a pastry scraper, transfer the dough to the pan retaining its rectangular shape as much as possible.
Spoon half of the herb oil over the dough. Use your fingertips to dimple the dough and spread it to fill the pan simultaneously. Be careful not to tear or rip the dough and try to keep the thickness as uniform as possible. Don't worry if it doesn't fill the entire pan. It will enlarge as it proofs. Use more oil to make sure that the entire surface is coated with oil. Add any other toppings you might want.
Toppings:
tomatoes, sun-dried tomatoes, onions, olives, nuts, herbs, peppers.
Cheeses can go on right before you bake or during baking. I would also put sun-dried tomatoes on during baking since you cook at 450F and they tend to burn.

Loosely cover with plastic wrap and allow to proof for 2 hours. About 15 min before baking drizzle on more herb oil, if you want. It adds a ton of flavor and even though it seems like a lot the bread will absorb it. Dimple it in like before and allow the dough to relax for 15-30 min before baking. The dough should be at least 1inch thick. Mine is usually a lot thicker than this.
Preheat the oven to 500F. Place the pan in the oven on the middle rack and lower the heat to 450F. Bake for 10 minutes. Rotate the pan 180 degrees, add any other toppings, and continue to bake for 5-10 more minutes. The dough will turn golden brown.
Remove from the oven and transfer the bread to a cooling rack. Allow it to cool for at least 20 minutes before serving.


Chocolate Ice Cream:
For the ice cream I followed the same recipe as previously posted for the vanilla ice cream. see post: ice cream.
For chocolate, obviously don't put a vanilla bean in it. Melt ~60 grams of chocolate (I used small size semi-sweet chocolate chips) in a double boiler and add to the cream just before straining. Continue in the usual manner.
I did get a new book, thanks Jake, called On Food and Cooking: The Science and Lore of the Kitchen. It discusses the making of ice cream and has various ratios of milk fat, egg yolk, non-fat milk components, sugar, and others. I didn't get a chance to go through that part of the chapter before making the ice cream but from my first time I felt the Professional Chef went a little high on the egg yolk count. 15 yolks for 1.44 L of ice cream to be exact. I went slightly lower in my first attempts and, although I haven't done the math yet, I think On Food and Cooking echoes that idea. Some of the recipes have a much higher % weight made up by egg yolks compared to others. So far, the chocolate ice cream is the best I've made and I decreased the egg yolk content on this one. Hell, I'll just give you the recipe, but check the original ice cream post for the method.
You need:
1.5 cups whole milk
1.5 cups heavy whipping cream
100g sugar
good pinch of salt
5 large egg yolks
50g chocolate, melted

This is the cream just prior to processing and freezing. mmmmmmm
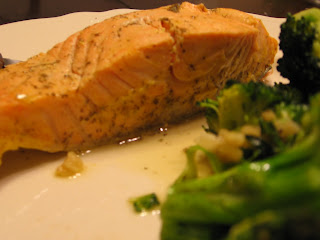
Lots of food


note: I couldn't get a pic of this meal so I am using a pic from the next time I made it. No, that green stuff isn't asparagus. It's cucumber salad.

Ok, I've been over at Anita's cooking for a couple days and our internet access is acting shoddy, so I'm finally posting today.

Day 1

The Menu:
-Asian-style salmon w/ mandarin oranges in honey soy sauce w/ white rice [Ana Bowen]
-Asparagus [AB]

Yes, Anita actually made these. The salmon is her recipe and is the best damn salmon I've ever had. I made it once (well, actually several times) for my extended family at our grandmother/mother/great-grandmother's 88th bday and it has been on request ever since. Not only is it stupid delicious but it is one of the simplest recipes to make.
For the salmon you need:salmon (I prefer boneless, skinless filets)
1 can mandarin oranges drained (I actually like to use some of the juice to help cut the saltiness of the soy sauce. Conversely, you could use water.)
soy sauce
honey
a little garlic if'n you wish. we were also going to try adding some fresh ginger this time but we forgot it.
sesame seeds

combine the honey and soy sauce to taste. Add the oranges, garlic, and sesame seeds. Place the salmon in a baking pan. Lining said pan with aluminum foil first will prevent burnt soy sauce mix on your pan.
Pour the mixture over the salmon making sure to cover the salmon with the oranges. Allow to sit and marinate for ~30 min. The sauce should come to 1/4 - 1/2 way up the salmon.
Bake at 350-375 (anita actually likes 325 to prevent the bubbly white fat thing from happening) for ~20-30 minutes depending on size of cut and temp. You might have to go 45 min at 325. About 10 min til done spoon more of the sauce over the fish. You're done. It's awesome.

Asparagus:Butter, garlic, asparagus, heat.

I want a Farmers Market

Meal:
See sharing is really caring. Last time it was venison. This time it was organic grass fed sirloin steak.

History:
Met clark and anita at the Dekalb Farmers Market yesterday. I did not want to leave. And I am now sad about the whole Augusta situation. No good food. Nothing like yesterday. That steak was awesome. No recipe this time because we already did it once. I just had to do it for my parents when I saw that cut of meat. And then I needed to share with everyone.

Thursday, March 4, 2010

Holy Lord Barbecue Ribs!!


Dining with a little bit of heaven tonight.
The Menu:
-BBQ Baby Back Pork Ribs [PC/CL]
-Garlic-Smashed Sweet Potatoes [CL]
-Sweet Vinegar Cole Slaw [CL/mi familia]

The Recipes:

BBQ Baby Back Ribs
There is a really good korean-style bbq ribs recipe in the Professional Chef. I didn't use this. I was going to, but then decided I wanted some straight-up southern BBQ. I used the same sauce as the BBQ Chicken on our previously posted "Nothing Green southern cooking" entry. I did however make a couple slight changes to the sauce. White wine vinegar and a little apple cider vinegar substituted for the white vinegar. I also like to spice it up more. I threw in some of the Berbere (ethiopian spice) for a darker burn and added granulated garlic.
I got a rack of baby back ribs and slow-grilled them. We have a gas grill (don't have a heart attack purists) and unfortunately, 350F is as low as it gets. For the most authentic bbq you would want to use wood chips and cook slow and low somewhere in the neighborhood of 200F. Let the ribs cook plain and once you've got 'em good and smoked you can slather 'em in sauce and let 'em go for a while longer to cook that sauce in. Go until it's falling off the bone.
Just for a reference, at 350 I was able to let it cook for about 1.5 hrs.

Garlic-smashed sweet potatoes:
Actually my first time using sweet potatoes. With other potatoes I always leave the skin on but I wasn't sure how that would turn out with sweet potatoes so I peeled and chunked them.
Steam in a pot til soft ~20 min. If you boil them like you would your typical idaho/russet potatoes they get really mushy and not very good.
Transfer steamed potatoes to a bowl, add chopped garlic, butter, salt, pepper, smash.

Sweet Vinegar Cole Slaw:
I hate cole slaw. I'm from as far south as you can get in this nation and cole slaw has always disgusted me. I'm just not a fan of mayonnaise and most of the cole slaw you come across is some poor conglomeration of defeated vegetables drowned in a sea of mayonnaise. This is not how I make cole slaw.
For the cole slaw you need:
1/2 head of cabbage, finely chopped
2 carrots, grated
1 red pepper, finely sliced
1 can of corn, drained
1/3 cup of rice vinegar
~2 tsp sugar
s/p

Combine all the vegetables in a bowl. Mix the sugar and vinegar and pour over the vegetables. Add s/p. Mix well and refrigerate for ~1 hr. Mix well and check seasoning before serving.

Wednesday, March 3, 2010

Sorry, not giving the recipe


History:
This is Irish Apple Cake. It was my grandmother's famous recipe, that I didn't know about until her funeral. So I made it for the wake, and this is best when it is warm. I knew it was missed when half was gone as it was cooling... my Uncle Paul kept eating it.

Ciabatta Bread [PR]


This ciabatta bread recipe is absolutely delicious. I have a real hard time not eating the whole loaf immediately. The first time I made it Jake, Anita, and I devoured it in a day. It's late right now and I'm tired and actually on the phone with Anita. I think she's getting sick of listening to me type and not listening to me talk so I'll post the recipe tomorrow.

This takes 2 days to make:
~3-4 hrs day 1 for poolish
~4-5 hrs day 2 fermenting, shaping, proofing, baking
The ciabatta recipe requires one of those pre-ferments called a poolish.
For the poolish you need:
2.5 cups/11.25 oz unbleached bread flour
1.5 cups water at RT
1/4 teaspoon yeast (just dump a little out of a packet, roll up tightly, and reserve for the full dough the next day)

Stir everything together til all the flour is hydrated. It should look like really thick pancake batter. Cover with plastic wrap and allow to ferment at RT for 3-4 hrs, til bubbly and foamy. Refrigerate.

Day 2:
Take the poolish out of the fridge and allow to de-chill for an hour.
for the ciabatta bread you need:
3 cup/13.5 oz bread flour
1 3/4 tsp salt
the rest of the yeast packet
~3/4 cup water lukewarm (you can also use milk, buttermilk, or add a little olive oil to make a softer version)

Like this:
Stir together flour, salt, and yeast. Add water and poolish. Mix vigorously for ~7 minutes to form a sticky ball. Add water if necessary.
The dough for this bread is very different from your typical bread loaf dough. It is very light and sticky. Really, the more water the better when it comes to ciabatta bread. As long as it has enough consistency to shape it, you're good to go. You do not knead this dough at all so don't worry about stickiness. The idea is retain all the gas from fermentation inside the dough to form the large, irregular holes ciabatta bread is known for.
Get a decent sized work area (I use half the dinner table) and lay down a good amount of flour. You want to make a bed ~8 in square. The dough will rest here so don't be stingy with that flour or it will stick and you don't want this.
Using a spatula, transfer the dough to the bed of flour and proceed to stretch and fold.
The stretch and fold method:
Dust the top of the dough liberally with flour and pat into a rectangle. Wait a couple minutes for the dough to relax. Coat your hands with flour and gently stretch the dough from each end to twice its size. Fold the dough over on itself, letter style, to return it to a rectangular shape.
Mist the dough with spray oil, dust with flour, and cover loosely with plastic wrap.
Wait 30 minutes and repeat the stretch, fold, mist, flour, cover routine. Allow to ferment for 1.5 to 2 hours.
Using a pastry scraper (or cleaver or whatever you've got) dipped in water divide the dough into 2 or 3 rectangles, taking care not to degas the dough. Generously dust the dough with flour and gently roll around to coat.
Prepare a baking sheet with parchment paper and cornmeal to prevent sticking. Lay the loaves (you might have to use 2 sheets to keep them from sticking to each other) on the sheet and gently fold, letter style, to form an oblong shape.
Mist the dough, dust with flour, then cover with a towel.
Let proof for 45-60 min.
Place a pan (for steam) in the oven and heat to 500F.
Place the loaves into the oven, pour 1 cup of hot water into the steam pan, and close the door.
After 30 seconds, spray the inside wall with water to create more steam. Repeat 2 more times at 30 second intervals. This will develop the crust. After the last time, reduce the temp to 450F and allow to cook for 10 minutes.
Rotate 180 degrees for even baking, if necessary, and allow to cook for 5-10 minutes more. The bread will be golden when done with a dusty look from the flour. The crust will be quite hard and crusty but will soften as it cools.
Cool the loaves on a rack for at least 45 minutes before slicing as the inside of the bread continues to cook after leaving the oven.
Be happy that you can now make some of the best bread you've ever had. Look out for the focaccia recipe. It is very similar to the ciabatta but you allow the bread to ferment/proof longer and add some other flavorings. It will blow you away.